How-To Guide
Film vintage condition clearly without turning the product video into a disclaimer
The job of a condition video is not to make the item look worse.
By the Superdirector editorial team.
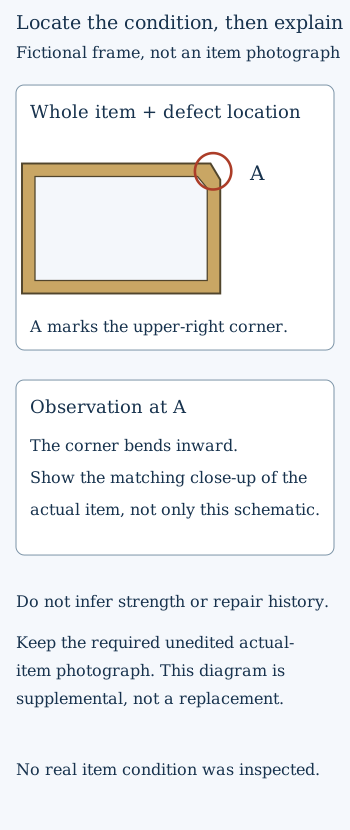
The diagram explains the evidence structure. It is not a photograph of an actual vintage frame and cannot satisfy an actual-item photo requirement.
 Superdirector
Make it work for your brand
Find it. Remake it. Post it. Superdirector turns the viral formats in your niche into your brand's carousels, X posts and video scripts, and keeps the calendar full.
A vintage product can look beautiful and still have a bent corner, a repaired seam or a missing part. The job of a condition video is not to make the item look worse. It is to help a buyer locate what matters and compare the visible evidence with the description before deciding.
For a one-off item, begin with its identity. The video, photographs, condition note and stored inventory piece must all refer to the same object. A reusable template is helpful; a representative product shot is not a substitute for showing the specific item being sold.
This guide proposes an original capture and review workflow. It does not report a tested seller outcome, guarantee fewer returns or determine a dispute result. References were checked on October 24, 2026.
Build a condition map before the shot list
Assign the item an internal identifier and inspect the surfaces you can reasonably examine. Record observations in four categories: ordinary wear, visible damage, repairs and areas not inspected. This is a production worksheet, not a formal appraisal.
An illustrative brass frame might have a bent upper-right corner and surface marks on the rear stand. Those details are fictional examples. The point is to use a location and a description rather than the vague phrase “normal vintage wear.”
For a repaired blouse, identify which seam was repaired and whether both sides can be shown. Do not infer who performed a repair, its age or its strength from appearance alone. If provenance or materials are unknown, keep that uncertainty rather than filling the narration with a plausible story.
Treat condition labels as summaries, not proof
In Etsy's vintage-shop handbook, vintage seller Jess Belflower recommends pairing a condition description with specific flaw photographs. Her condition labels are explained as her working definitions, not a universal grading standard.
That distinction is useful for a launch script. “Good condition” can open a description, but it does not tell a buyer where a repair sits or what a missing component means. Follow the label with the observable fact and the image that supports it.
Etsy's current image policy requires accurate depiction of condition and forbids edits that hide flaws. For most products it also requires at least one unedited actual-item photograph, with product-specific exceptions. Keep the applicable original photo in the listing; an annotated diagram or edited video is supplemental, not a replacement.
Show the whole item before the detail
A close-up without orientation can make a small flaw seem enormous or leave the viewer unable to find it. Start with the whole item in a stable view. Then move to the relevant area without switching to an unrelated piece or reversing the orientation unnoticed.
For the fictional frame, the sequence is whole front, upper-right corner, rear stand and full rear. A neutral pointer may identify the area in a supplemental annotated frame. It should not cover the damage or create a misleading impression of its dimensions.
For the blouse example, show the repaired seam in context, then its visible outer and inner surfaces where accessible. Use the actual garment rather than a pristine substitute for the hero shot. Keep lighting and exposure consistent enough that the detail view remains comparable with the full view.
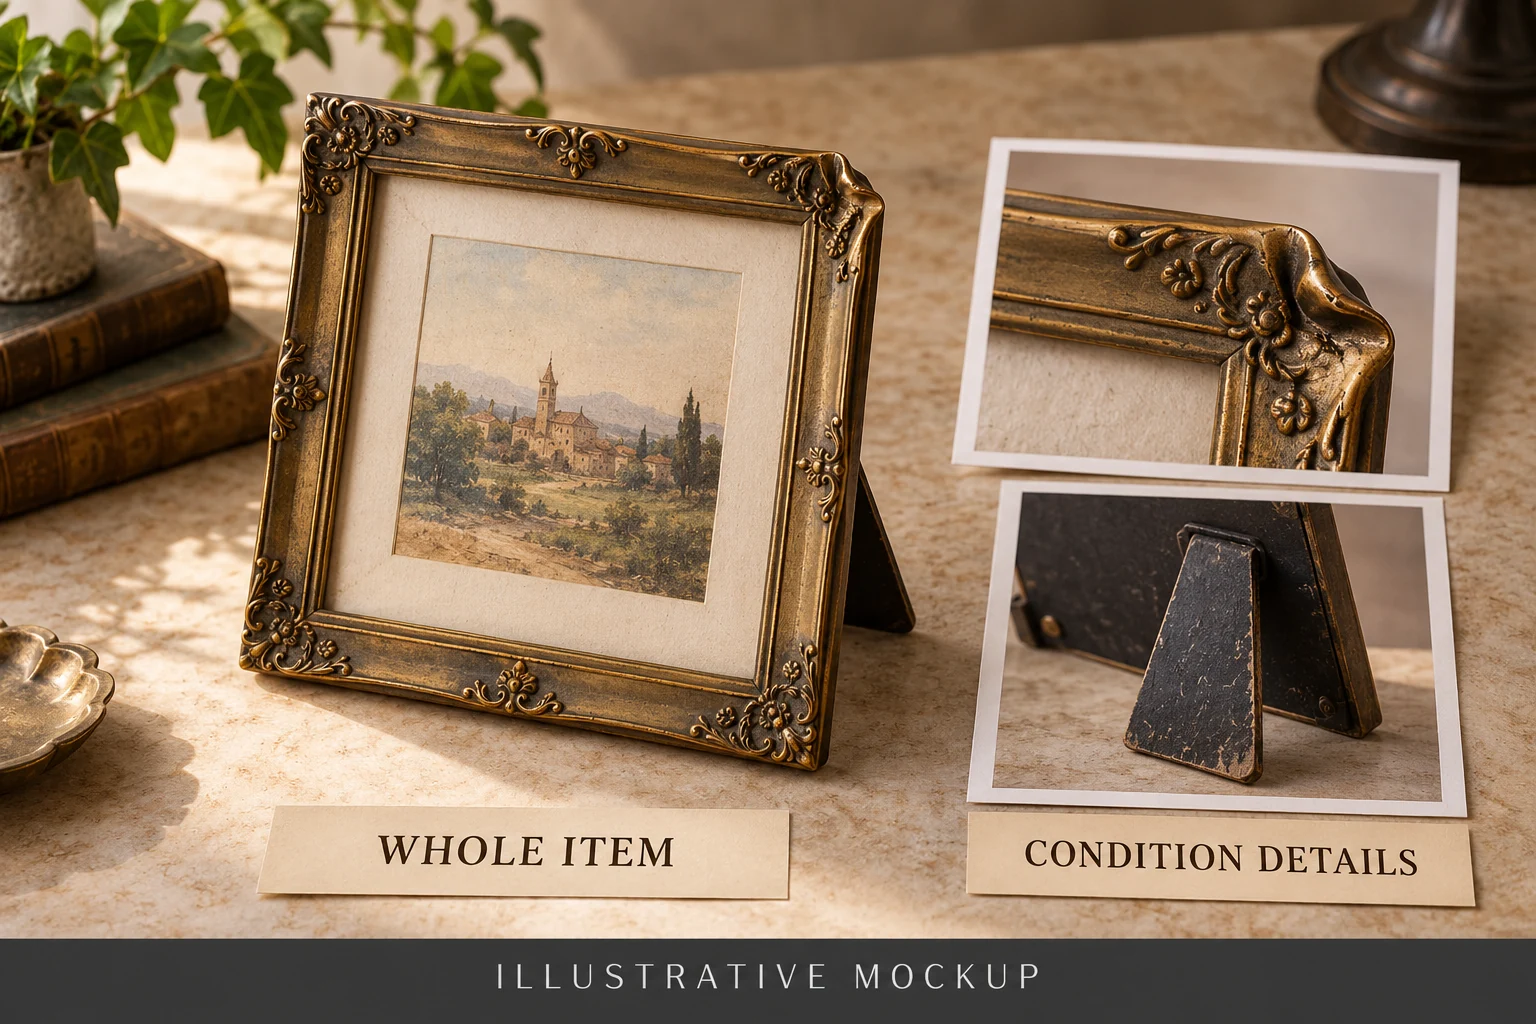
AI-generated illustrative mockup. The frame and defects are fictional. This demonstrates a whole-item-to-detail shot sequence, not the condition, authenticity or safety of a real vintage item.
Make a short sequence earn its time
A concise edit can use four purposeful shots:
- Identify the exact item and its overall appearance.
- Locate the first decision-relevant condition detail.
- Show the detail clearly, with a literal observation in narration or caption.
- Return to context or show another relevant side before ending.
The number of shots is an editorial suggestion, not a platform requirement. Add another shot if an important condition feature would otherwise be hidden. Cut repetitive mood footage before cutting the evidence a buyer needs.
Avoid music or rapid transitions that make the condition captions difficult to read. On a mobile screen, a small pointer and a long sentence can become unusable even when the original footage is sharp. Review the asset at its actual displayed size.
Match one sentence to one visible observation
For every condition sentence, identify the supporting frame or photograph. If the sentence says “repaired seam visible inside the left sleeve,” the asset should show that location rather than a generic sleeve shot. If the image cannot establish the claim, either obtain the necessary evidence or narrow the wording.
Likewise, inspect the reverse direction: does a visible issue appear in the video without any explanation in the description? Do not assume that “see photos” communicates the same observation to every viewer. A buyer should not have to decode a fast-moving clip to learn the basic condition statement.
Use a reviewer who has not seen the worksheet
Show the draft asset and ask the reviewer to point to the condition feature and describe it. Do not first tell them which corner or seam to inspect. Compare their answer with the worksheet afterward.
If they locate the wrong area, revise orientation or labeling. If they interpret a repair as a decorative feature, adjust the description. If they infer functional damage that was never assessed, distinguish the visible observation from the untested function.
This is a proposed comprehension check, not a claim that any reviewer has tested this example. A content review also cannot certify the safety, authenticity or remaining life of an item.
Preserve the link to the inventory piece
Store the original captures with the item identifier and capture date. Before dispatch, confirm that the item and included parts still match the listing evidence. If its condition changed after filming, the old asset no longer describes the sale accurately.
Capture one actual item's condition map and test whether a viewer can locate the disclosed detail without coaching. Keep the map, photographs and description tied to that inventory item.